Today’s work environment is certainly not what anyone had anticipated it would be at the beginning of this year. Today, most of the world is forced to work from home (WFH) unless deemed an essential employee. This can add several challenges to an organization. While organizations have scrambled to implement company-wide VPN and issue laptops to employees that are normally sitting in an office, one aspect that’s proving to be a challenge is dealing with the latency seen in home broadband networks. Now perhaps your organization has migrated to cloud apps such as Microsoft Office 365, still, one thing rings true; from the time your application traffic leaves the laptop to the time it reaches your cloud provider, IT organizations have little control of the latency that users will experience. So in this article, I’m going to walk you through the process of configuring Riverbed SaaS Accelerator, Cloud Controller, and Client Accelerator so that end users can immediately benefit from our application acceleration and optimization techniques. Let’s get started.
Solution components
There are three components to the solution I’m covering in this article.
I’m going to cover the configuration of each of these, but let me give you a bit of an overview of the three first, beginning with SaaS Accelerator. SaaS Accelerator is a Riverbed Hosted SaaS offering. You’re given access to SaaS Accelerator Manager, which acts as your cloud-hosted management interface to configure and monitor SaaS Acceleration. SteelCentral Controller for SteelHead Mobile is a virtual appliance you can deploy in your data center or in the cloud, for example in Azure.
Finally, Client Accelerator, formerly known as SteelHead Mobile, is a client application for Windows or macOS that performs client-side application optimization between the user and a cluster of Riverbed Cloud SteelHeads. Each of these three components are required to accelerate application traffic. With that said, let’s get into the configuration.
Configuration walkthrough
If you prefer to watch the configuration, I invite you to view the following video where I walk and talk you through each of the following steps. If you’re the reading type, you can skip it and continue on.
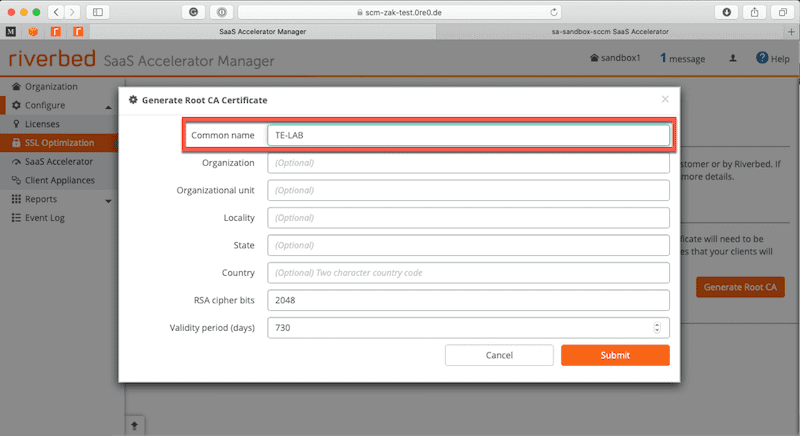
Now, if you’re still with me let start by logging into SaaS Accelerator Manager. You can see this in the image below. What you’re looking at is the first step in the configuration. A Root Certificate needs to be generated. The only requirement is the Common Name. I’ve set that to TE-Lab.
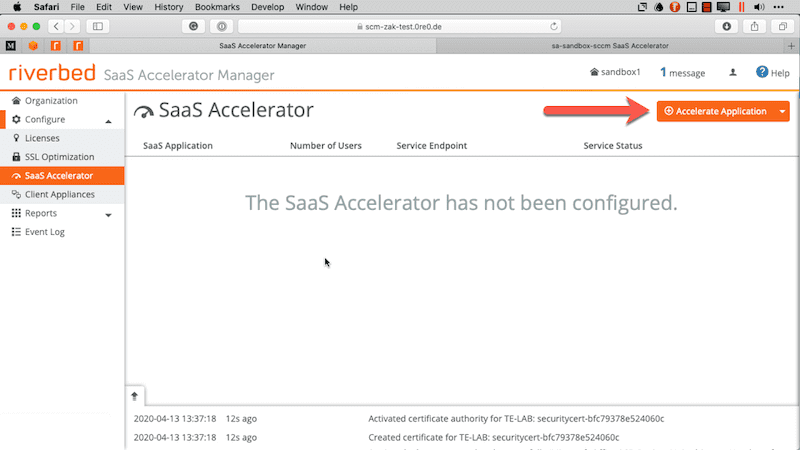
The next step is to enable acceleration for an application. In the image below, there are no applications being accelerated right now. By clicking the “Accelerate Application” button, you’ll get a configuration page that requires our attention.
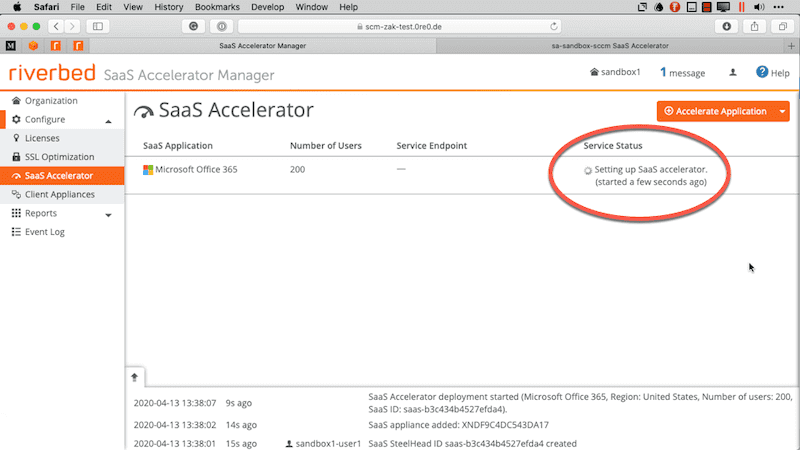
To enable the service, we need to select which application we want to accelerate. We support Office 365, Salesforce, and Box to name a few. Next, we select the Region. Finally, we select the number of users that we will be accelerating for at any given time. These steps are important because of what needs to happen in the background after you click submit. So what’s that? Well, in short, a cluster of SteelHeads along with load balancers and additional network plumbing is brought up in the cloud, right in front of the Office 365 tenant in the United States (based on the region we selected). This lets us accelerate traffic from end-to-end, dropping your accelerated traffic off at the front door of the service.

You can see that process happening in the background in the image below. The service status will provide updates until the service is up and ready. This process usually takes less than 10 minutes.
While we wait for the service to be ready, we now jump over to the SteelCentral Controller for SteelHead Mobile. Our first action is to tie the SaaS Accelerator Manager (SAM) to the controller and vice-versa. To do this, we need to provide the FQDN of SAM and the Registration token that you retrieve from SAM under the Client Appliances page.
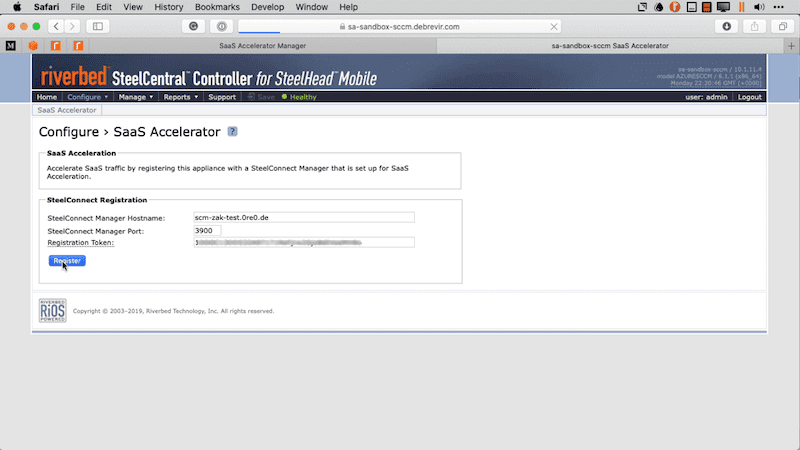
This immediately puts us on the Gray List.
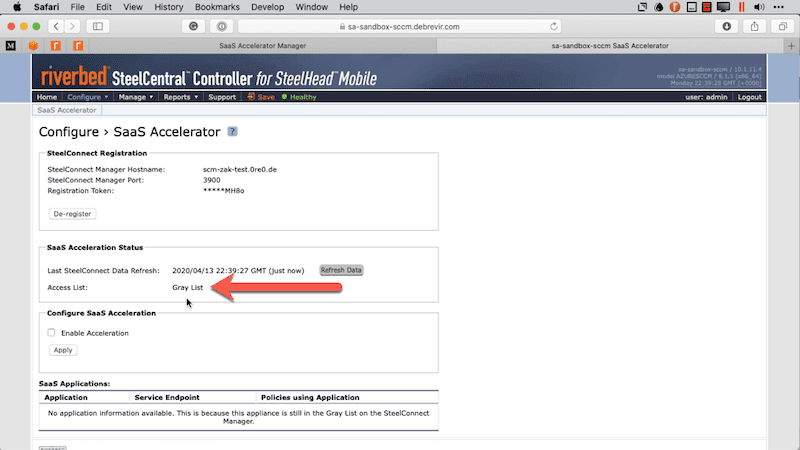
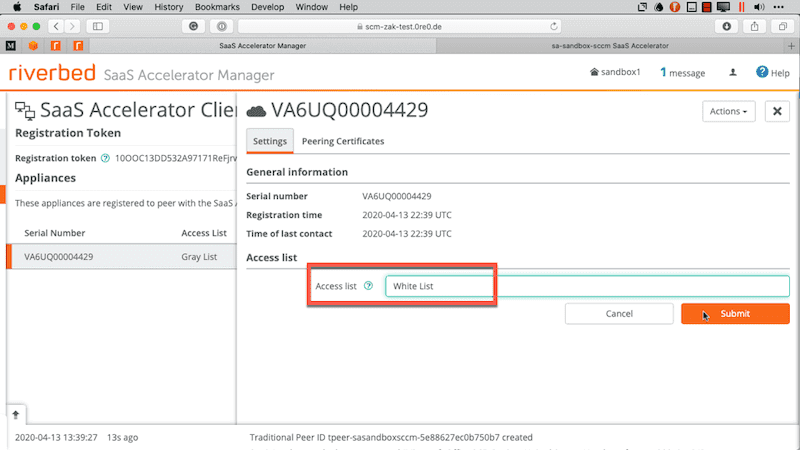
To get us off the gray list, we need to head back to SAM. We now see the serial number entry for the controller in SAM and we can click it to move it to the white list.
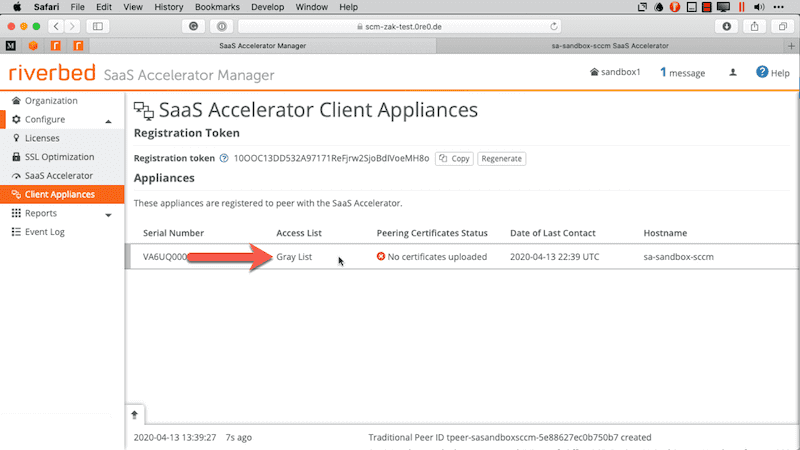
In the following image, you can see that we have moved the controller to the white list. At this point, the two will communicate with one another.
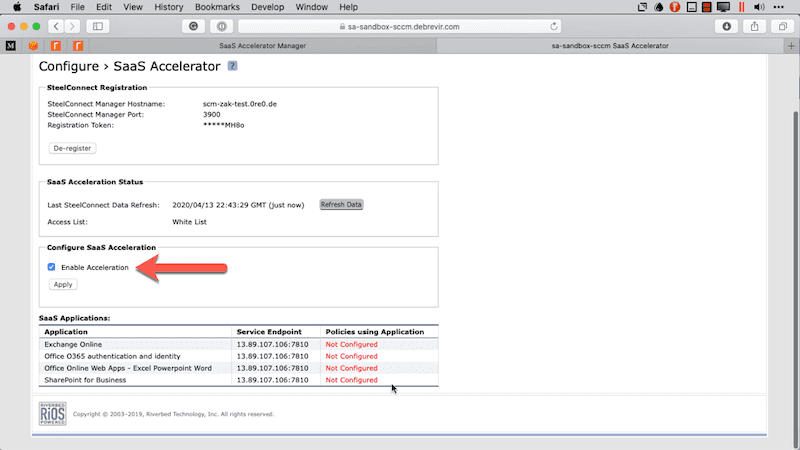
Moving back to the controller, we enable acceleration. When we apply you will see a list of applications and the service endpoint for acceleration. This comes from SAM and the information is based on the cluster that was created when we enabled the service.
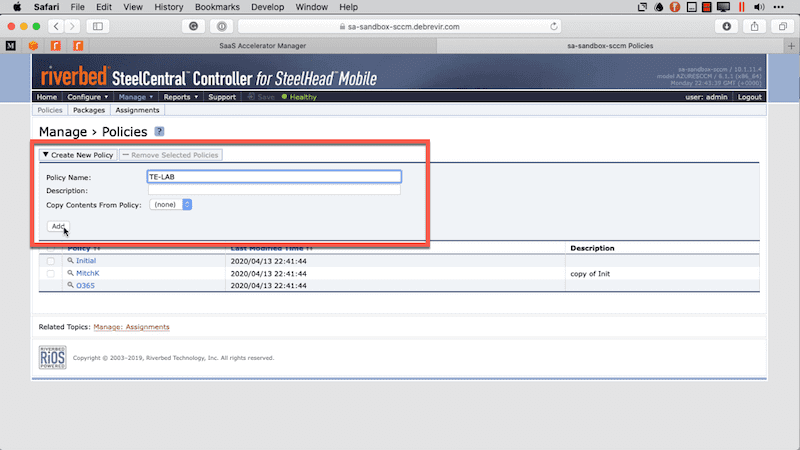
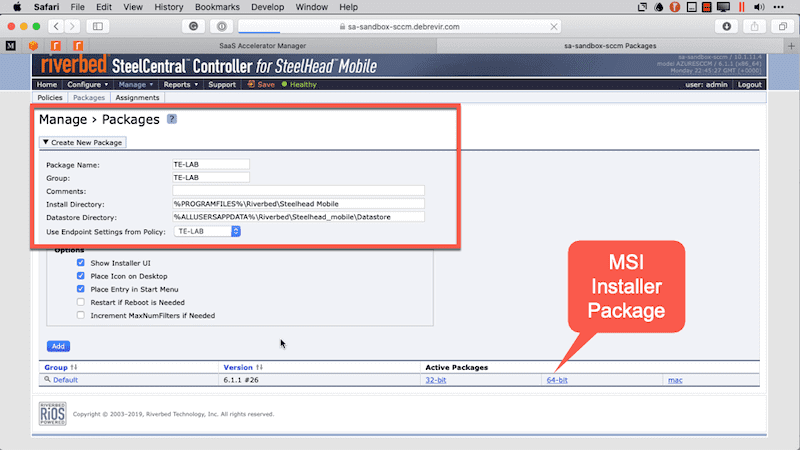
Now we need to create a policy on the controller to tell our client to accelerate Office 365 traffic. We’re going to apply this policy to an MSI package later on.
Once the policy is created, we need to create the rules. Here I’m creating one of four rules that are required for Office 365 traffic. Most of the rule is left at its default values, however, we set the Destination Subnet or Host Label to SaaS Application and then select the app from the dropdown.

After this has been done for all four of the Office 365 traffic types, we can see each of the rules.

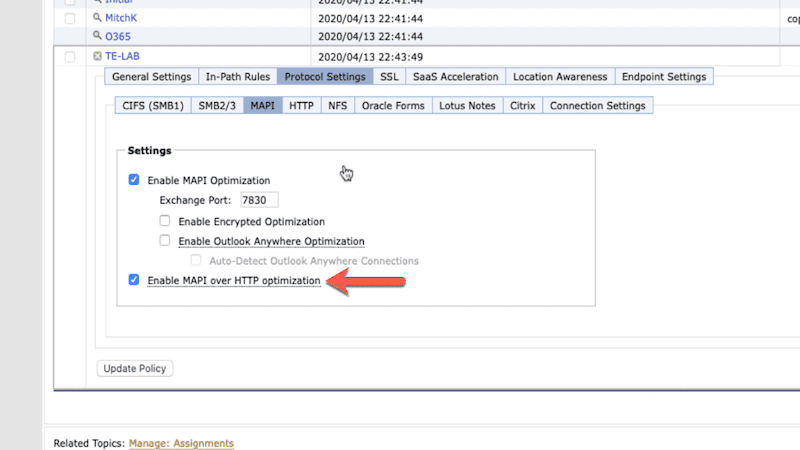
In addition to the In-Path rules, we need to enable MAPI of HTTP optimization.
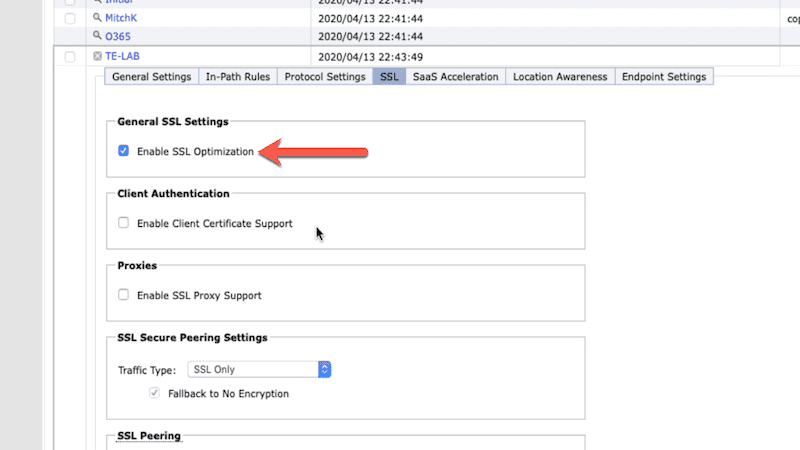
Then we need to enable SSL Optimization.
And finally, we enable SaaS Acceleration. Clicking “Update Policy” finalizes the policy creation.

Next, we create a package that ties the policy to the client. Here I am creating a package called TE-LAB. The group is TE-LAB and the endpoint settings will come from the TE-LAB policy where we created the in-path rules. You can also grab the MSI from here. On a side note, the controller requires you to save the configuration. You can see the save button in the menu bar in the image below. Make sure you click it!
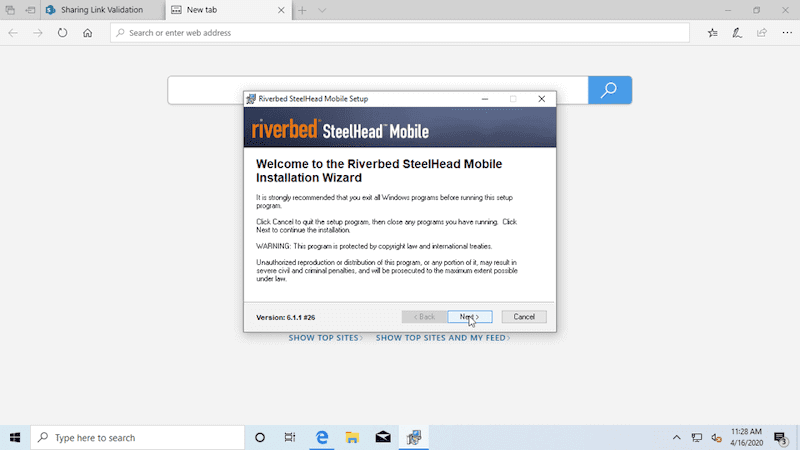
At this point, the service is ready to rock but we need to throw some hosts at it. We’ve downloaded the client installer to the machine you see in the following image. Let’s run that file and work through the installation wizard. This is pretty basic stuff here so I’ll spare you the multiple screenshots, however, one thing I should mention is that you probably wouldn’t install this manually on all your clients. You can use whatever your software management tool of choice is to push to multiple clients at once.
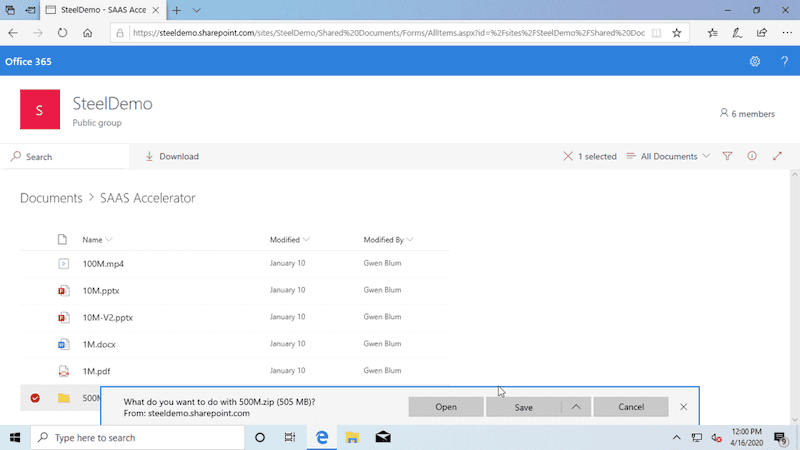
After the install completes and the client is running, it’s time to send some traffic. In the image below, I’ve logged into my SharePoint site and I’m downloading a 500MB file. The first time I did this without Client Accelerator installed, it took me about two minutes to download.
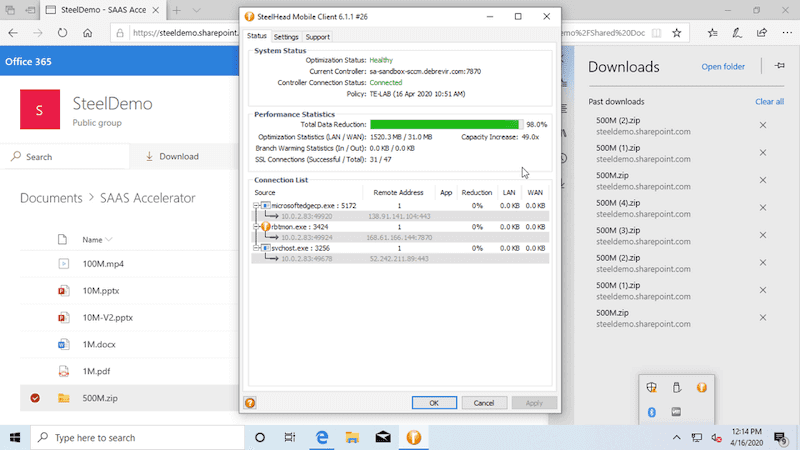
After Client Accelerator was installed, it took me about 30 seconds.

Why such a difference? Well, have a look at the image below. Here we are looking at Client Accelerator and you’ll notice the Performance Statistics showing 98% data reduction. happening here? Well, this is just one of our techniques used to accelerate traffic. A local cache is created on the client. The default size of the cache is 10GB. As files are transferred. this information is cached. When a file is retrieved we don’t have far to go. Making changes to files means that only the changed data needs to be transferred, not the entire file.
There are of course other techniques that are used, for example, we also reduce the number of application turns by handling that locally between the client and the agent (Client Accelerator) rather than send all that protocol data over the network and waiting for a response from the service side when most of it is unnecessary and inefficient.
Wrap up
As you can tell by the walkthrough here, the setup is not too complex. There are a few areas you need to interact with: the SAM, the controller, and the Client Accelerator agent. Still, the benefits are immediate and quantifiable. I hope you found this article interesting and look forward to your comments.